Have you heard about GitHub Copilot? It launched back in 2021 thanks to a collaboration between Microsoft and OpenAI, and it’s completely changed the way developers write code. Imagine having an AI “pair programmer” right there with you, suggesting code snippets, fixing bugs, and even doing full refactors. It saves tons of time on those tedious, repetitive tasks.
What’s even cooler is that Microsoft didn’t stop there. They expanded Copilot beyond just coding—it’s now part of Bing, the Edge browser, and even Microsoft 365 apps like Word and Excel. Tons of developers all over the world use it daily. It’s like having a smart assistant that makes coding and other tasks way easier. Let’s dive deeper into how you can make the most of it.
Getting Started with GitHub Copilot
To get started with GitHub Copilot, you first need access. This means you’ll need to subscribe to a GitHub Copilot plan. There’s also a free version available, but it comes with some limitations—more on that later.
Once you have access, the next step is installing the Copilot extension or plugin in your IDE. Here are a few common IDEs and how you can install Copilot:
- VS Code: Install directly from the Visual Studio Marketplace.
- Visual Studio 2022: Use the Visual Studio Installer or go to Extensions > Manage Extensions.
- JetBrains IDEs: Install via the JetBrains Marketplace.
- Eclipse: Install from the Eclipse Marketplace or through the Update Site.
- Vim/Neovim: Install copilot.vim via your preferred plugin manager (e.g., vim-plug, dein, etc.).
Once installed, the IDE will prompt you to sign in to your GitHub account. Just follow the steps to authorise Copilot, and you’re good to go!
Supercharge Your Workflow with GitHub Copilot: Tips and Tricks
GitHub Copilot is more than just a fancy autocomplete tool—it’s like having a coding partner right in your IDE. But installing it alone won’t magically improve your workflow. To really unlock its potential, you need to know how to interact with it, leverage its surrounding tools, and treat it as a collaborator rather than just a code generator.
Here are some practical tips and clever techniques to help you get the most out of Copilot Chat, slash commands, debugging tools, and project-wide assistance—all without leaving your development environment.
Set Copilot Up for Success
Copilot works best when it understands the context of your code. If you don’t provide enough information, it may offer generic or off-target suggestions. To give Copilot the best chance to succeed:
- Write clear, descriptive code, use helpful comments, and open all related files.
- Use clear, intention-revealing variable and function names (this is a good practice anyway).
- Add docstrings or comments to guide the AI.
- Make sure imports and dependencies are already in place.
Think of it like onboarding a new teammate—Copilot works best when you clue it in.
Use Inline Chat for Quick Interactions
One of Copilot’s most underused features is inline chat—a way to ask small, specific questions right next to your code. You can ask for explanations, refactoring, or small fixes without breaking your flow.
For quick interactions, simply highlight the section of code you’re working on and press Cmd+I (Mac) or Ctrl+I (Windows/Linux).
A pop-up will open where you can ask questions like:
- “Can you make this more efficient?”
- “Explain what this loop is doing.”
- “Rewrite this in a more readable way.”
This is great for one-liner questions, but don’t use it for long conversations
Level Up Your Copilot Chat Game
If you’re just typing basic questions into Copilot Chat, you’re only scratching the surface. To really get the most out of it, you need to make your prompts more specific, efficient, and structured. Treat it like a conversation with a smart peer. Here are some tips:
- Use @workspace to give Copilot access to the full context of your project.
- Always highlight relevant code before asking a question.
- Break down large tasks into smaller ones (“Write the function,” then “Add tests,” then “Optimize it”).
- Clean up old or irrelevant chat messages to stay focused.
- After getting code suggestions, ask for a code review: “Does this follow best practices?” or “Did I miss any edge cases?”
Slash Commands: Your AI-Powered Toolbox
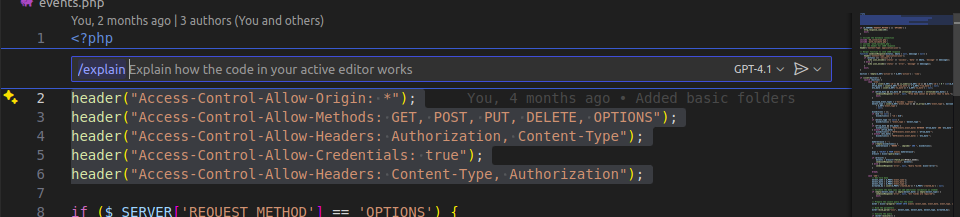
Slash commands are built-in shortcuts that let you tell Copilot exactly what you want. No need for long, wordy questions—just type a slash (/) followed by the command. Here are some of the most useful ones:
| Slash Command | What It Does |
| /explain | Explains selected code |
| /fix | Suggests and applies a fix |
| /tests | Generates tests for selected code |
| /doc | Adds documentation or comments |
| /optimize | Improves performance or clarity |
| /generate | Creates new code from your description |
| /comment | Adds inline comments for readability |
| /regex | Builds a regex from a plain-language pattern |
| /convert | Translates code to another language |
| /summarize | Describes code in natural language |
You can even chain these commands together for a complete code enhancement loop like:
/fix → /tests → /doc → /optimizeSlash commands are like your AI-powered toolbox—they save time and eliminate guesswork.
Attach Files for Full Context
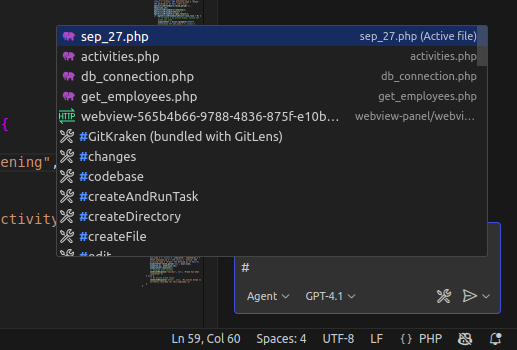
If your question spans multiple files or components, Copilot may need a broader view than just the file you’re working on. To give it full context, use #filename.ext to refer to another file in your project. You can also attach multiple files if your question involves multiple modules, which is super helpful for complex systems.
Debugging with Copilot
Before diving into manual debugging, try letting Copilot assist. It often spots issues right away. Highlight the broken or confusing code and ask questions like
- “Why is this throwing an error?”
- “Is there a logic issue here?”
- “Suggest a fix.”
Once you get a fix, ask Copilot to generate tests to confirm if the problem is solved. Copilot isn’t perfect, but it’s surprisingly helpful when you’re stuck or second-guessing a block of code.
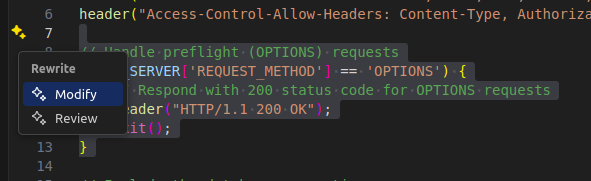
“The Sparkles” in the UI
You might have seen ✨ sparkle icons popping up in your editor or GitHub interface. These are AI entry points you should definitely use. Sparkles allow you to generate commit messages, summaries, or inline suggestions with just one click. You can find sparkles in the commit message box (auto-summarisation), inline code suggestions, and even in PR descriptions or diffs on GitHub. If you see a sparkle, click it—it’s Copilot offering help proactively.
Where Copilot Shines (and Where It Doesn’t)
Understanding Copilot’s strengths lets you focus on areas where it can add the most value. Copilot is amazing at:
- Generating boilerplate code
- Writing unit or integration tests
- Documenting functions and classes
- Creating readable inline comments
- Translating code from one language to another
- Writing regex and other pattern-based logic
- Remembering syntax in unfamiliar languages
However, always double-check security-sensitive code, business logic, third-party API usage, and anything that’s going into production. Copilot is powerful, but you’re still the engineer in charge.
How Not to Use GitHub Copilot
GitHub Copilot is a powerful AI assistant that can boost your productivity, but careless usage can introduce risks and slow your growth as a developer. Here are a few things to keep in mind:
- Never expose sensitive data like API keys or passwords in your code. Use placeholders or secure tools (e.g., GitHub Secrets, Vault, AWS Secrets Manager) to manage secrets and prevent leaks.
- If you don’t want Copilot to use your code, you can disable it locally by adding a .copilot/settings.json file or turning it off in your editor’s settings. You can also mark parts of your code with comments like #copilot-ignore-start and #copilot-ignore-end.
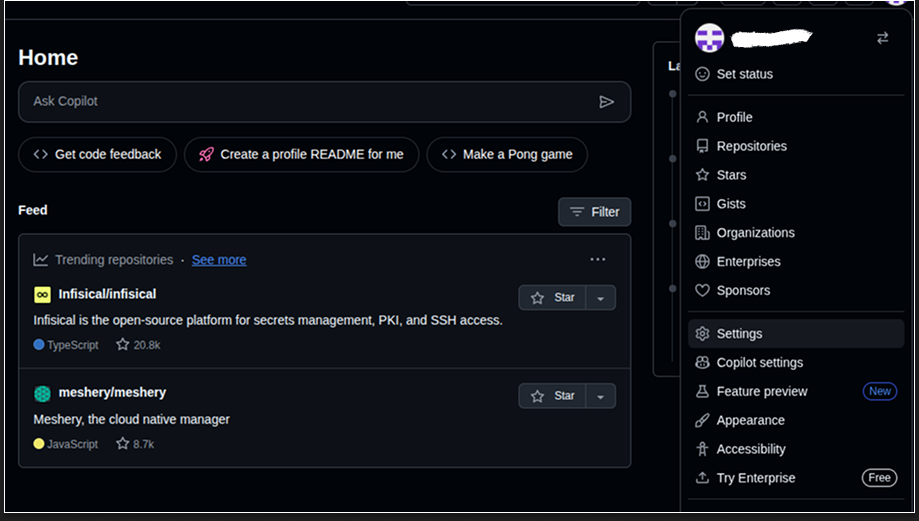
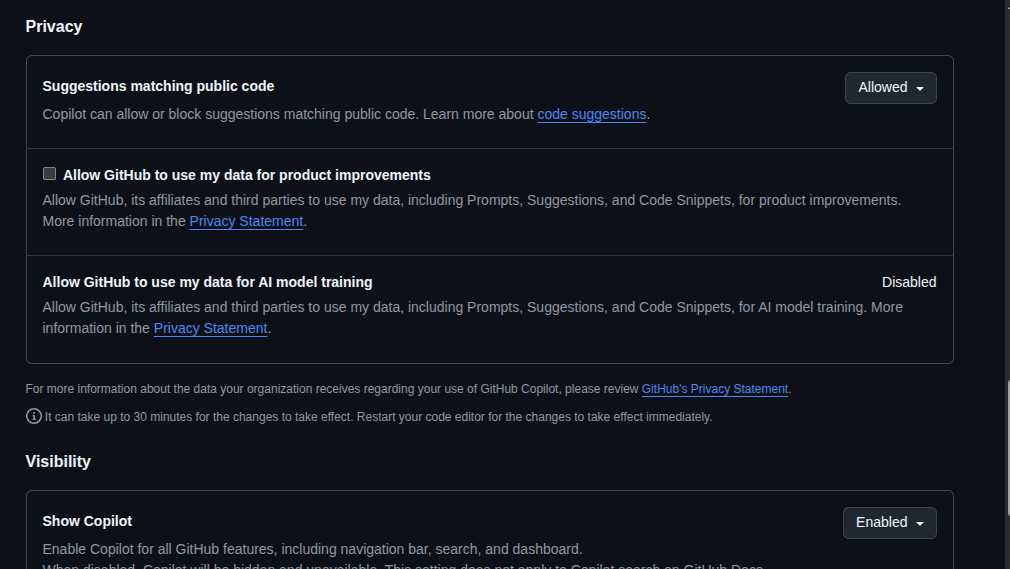
- Regularly review your privacy and telemetry settings to minimise data sharing. To check your privacy settings, log in to your GitHub account, go to settings, and then navigate to Copilot to adjust your preferences.
- Always review auto-generated code for security and licensing issues. Tools like Black Duck can help with this.
GitHub Copilot Plans
Here’s a breakdown of what the different GitHub Copilot plans offer:
- Free: Available for everyone with limited functionality. This includes 50 agent mode or chat requests per month, 2,000 code completions per month, access to Claude Sonnet 3.5, GPT-4.1, and more.
- Individual: $10/month or $100/year. This plan includes all the free features, plus unlimited chats and agent mode with GPT-5 Mini 1, unlimited code completions, access to GPT-5, Claude Sonnet 4, Gemini 2.5 Pro, 6x more premium requests, optional add-ons, and a coding agent for generation and review.
- Teams: $19/month per user. This plan offers team collaboration features, admin controls, and priority support. It includes unlimited agent mode and chats with GPT-5 Mini, unlimited code completions, access to code review tools, Claude Sonnet 3.5/3.7/4, Gemini 2.5 Pro, and more. Each user gets 300 premium requests (expandable), as well as user management, usage metrics, IP indemnity, data privacy, and a built-in coding agent.
Business: Custom pricing for larger organisations, with advanced security, collaboration features, and dedicated support.
Leave a Reply to Aditya Kattukar Cancel reply